Paradise

Wednesday, 10 October 2012

Gluten Free Italian Pasta Bake

Gluten Free Italian Pasta Bake


Today's dinner was super easy and really good, and it made a ton! The four of us ate it for dinner and there was enough leftovers to pack for all our lunches for tomorrow.

I absolutely love Tinkyada pasta, I've tried a couple other kinds of gluten free pasta and nothing else compares to it. Last weekend I used it to make homemade baked macaroni and cheese and the whole pan was devoured in no time. So tonight I decided to make another macaroni noodle style dish, but more along the lines of a baked ziti or similar Italian pasta bake.

The result was delish and family friendly.


Makes 6 large servings


Ingredients

  • 1 (454g) package Tinkyada brown rice elbows (macaroni)
  • 1 pounds ground chicken (or beef, pork or turkey)
  • 1 onion, chopped
  • 1 jar (640ml) pasta sauce
  • 1 can (398ml) Italian stewed tomatoes
  • seasonings to taste (Italian seasoning, garlic powder, onion powder, salt and pepper)
  • 2 cups shredded mozzarella cheese
  • 1/2 cup grated Parmesan cheese


Instructions

  1. Cook pasta according to package directions (less 1 minute). Rinse with cold water and drain well.
  2. Cook the ground meat and onion in a large pot over medium high heat until the meat is well browned, stirring often. Drain fat.
  3. Add in the pasta sauce, stewed tomatoes and seasonings. Bring to a boil, reduce heat and simmer for 10 minutes.
  4. Stir in the pasta, 1 cup mozzarella and Parmesan cheese.
  5. Put the mixture into an 9x13 baking dish and top with the remaining mozzarella.
  6. Bake at 350 degrees F for 30 minutes.

Tuesday, 9 October 2012

Gluten Free Chocolate Chip Banana Muffins

Gluten Free Chocolate Chip Banana Muffins

I know, I haven't posted in ages. At first I was just going to take the summer off, but before I knew it September came and went and now it's almost mid-October.

I had an interesting experience this summer... I decided that maybe I shouldn't be gluten free, maybe I was supposed to be dairy free instead! (yep, brilliant suggestion of a doctor I saw over the summer). Ummm... let's just say that wasn't the best advice I ever followed. I paid dearly for that little experiment and it took about a month for me to get my body back on track. 

However, one little bit of knowledge gained through that dietary experiment, is that I learned that I'm quite possibly sensitive to soy.  This was something I learned after my mom noticed I had terrible bouts of diarrhea (sorry TMI) after I had Starbucks made with soy milk instead of dairy (a few times).  Glad she was there to point out that connection to me, apparently I'm a little slow! lol.  

So after that I started looking up soy allergies and sensitivities and quickly realized that soy is in EVERYTHING.  So I started out being really diligent about looking for hidden soy in everything, but it's just too difficult, so now I'm compromising by avoiding the majorly obvious soy containing foods and ignoring it in some other foods (like salad dressing and chocolate chips).

And on that note... here's a recipe for Gluten Free (but probably soy containing) Chocolate Chip Banana Muffins. These turned out really good and my kids loved them too!


Makes 12 servings


Ingredients

  • 1/3 cup canola oil
  • 2/3 cup brown sugar, packed
  • 2 large eggs
  • 1 teaspoon vanilla extract
  • 1 3/4 cups all-purpose gluten-free flour
  • 2 teaspoons baking powder
  • 1 teaspoons cinnamon
  • 1 teaspoon xanthan gum
  • 1/2 teaspoon salt
  • 3 mashed ripe bananas
  • 1/2 cup chocolate chips


Instructions

  1. Preheat oven to 350.
  2. Fill 12 muffin cups with muffin liners.
  3. Cream together oil, sugar, eggs and vanilla in large bowl. Add bananas and continue mixing until smooth.
  4. In a separate bowl, combine flour, xanthan gum, salt, baking powder and cinnamon to egg mixture. (I use a whisk to combine the dry ingredients)
  5. Slowly add the dry ingredients to the wet ingredients, whisking well between each addition (add dry ingredients in about 4-5 increments).
  6. Stir in chocolate chips.
  7. Fill each muffin cup approximately two thirds full.
  8. Bake for 23 minutes.

Tuesday, 26 June 2012

Refried Bean Tostadas


There's something about corn tortillas that I don't like, at least not while they're uncooked or plain. That's why I can't use them for wraps for sandwiches and stuff like that. But I do like them if they're cooked until crisp or used in tortilla casseroles! And I absolutely LOVE refried beans (just the store-bought, fat-free canned type). So tonight I decided to make something that would use both.

Hubby wasn't home for dinner so I was free to make whatever I wanted, even a meal without meat! Imagine that. He would never consider a meatless meal to be dinner. 

Anyway, I decided to make Refried Bean Tostadas tonight and they turned out very yummy if I do say so myself! I'm sure they would also be awesome with some taco seasoned chicken or ground beef instead of, or in addition to the refried beans (note to self for future hubby-approved carnivorous dinners).  :)

Refried Bean Tostadas


Refried Bean Tostadas
Yield:  2 servings

4 6" corn tortillas
1 cup refried beans
1/2 cup shredded cheddar cheese

Optional Toppings:
 - lettuce
 - tomatoes
 - onions
 - olives
 - sour cream
 - guacamole
 - salsa

Directions:
  1. Preheat oven to 350 degrees.
  2. Cook the tortillas in a single layer on a cooking sheet and bake them in the preheated oven for about 8 minutes.
  3. Remove from oven and top the tortillas with 1/4 cup refried beans and 1/8 cup of shredded cheese.  
  4. Bake for another 5 minutes.
  5. Remove from oven and top with any or all of the optional toppings.

Friday, 22 June 2012

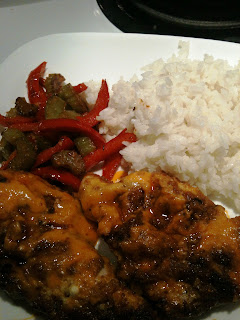
Sun-Dried Tomato Pesto Baked Chicken Breasts

I  bought a package of cream cheese and sun-dried tomato pesto pasta sauce because I was going to make an appetizer dip for a Bunco party I went to last weekend...  but I ended up making something else instead. (I made cute mini antipasto skewers which were toothpicks with salami, cheese and olives on them). I'll have to post a picture.

Anyway, I wanted to use the sun-dried tomato pesto for something else and came up with this scrumptious baked chicken breast recipe!  I served it with rice and a red pepper/celery side dish.

Sun-Dried Tomato Pesto Baked Chicken Breasts


Sun-Dried Tomato Pesto Baked Chicken Breasts
Yield:  4 servings

4 chicken breasts, boneless skinless (I cut each breast in half to make thinner pieces)
1 pkg (170g) sun-dried tomato pesto (I use Western Family fresh pasta sauce)
2 Tbs parmesan cheese
1 cup shredded cheese (mozza or cheddar)

Directions:
  1. Arrange chicken in a baking dish and spread evenly with half the sun-dried tomato pesto, then flip chicken over and spread the remaining sun-dried tomato pesto on top of the chicken. Cover the baking dish and cook at 375 degrees for 30 minutes.
  2. Remove cover and sprinkle the chicken with the parmesan cheese and shredded mozza or cheddar and continue baking for another 5-10 minutes uncovered.

Thursday, 21 June 2012

Broccoli Chicken Divan (using cream soup)

Broccoli Chicken Divan

Broccoli Chicken Divan
Yield:  6 servings

1 lb cooked, cubed chicken breast (about 3 cups)
1.5 lbs steamed, fresh broccoli (about 6 cups)
2 cans cream of chicken soup (I found a store brand that has no gluten)
1/5 cup milk
1 tsp mustard
salt & pepper to taste
1/4 cup parmesan cheese
2 cups shredded aged cheddar 
1 cup breadcrumbs *see note below

* For these breadcrumbs, I lightly toast 2 slices Udi's GF bread then whirl in my mini chopper along with a few shakes of parmesan cheese and about 1 Tbs butter until it's a fine crumbly mixture.

Directions:
  1. Arrange chicken and broccoli in a 9"x13"baking dish and top with cheddar cheese.
  2. Whisk together the cream of chicken soup, milk, mustard and salt & pepper.
  3. Pour the the soup mixture over top of the broccoli, chicken and cheese and sprinkle with the breadcrumbs.
  4. Bake at 400 degrees for about 20 minutes (make sure crumbs don't get to brown).

Monday, 18 June 2012

Flourless Oatmeal Chocolate Chip Raisin Coconut Cookies

Long title huh?  Well, I wanted to make sure all the key ingredients were listed! Oh and I didn't even have room to mention that these are a breakfast cookie. Not that they have to be breakfast cookies, they can be anytime cookies, but I was specifically trying to make these a low fat and healthy muffin alternative. 

I'm not brave enough to venture into baking with gluten free flours yet (mostly because I hate baking), so instead of a breakfast muffin, I decided to go with a flourless cookie instead.

This recipe is still a work-in-progress. I've made these twice so far, adjusting the ingredients slightly each time and plan to change things just a little more next time too by substituting coconut oil for the butter. The recipe is great as is, but just a tad crumbly.

These pictures are from the first batch I made...

Before Baking

Fresh out of the Oven

Flourless Oatmeal Chocolate Chip Raisin Coconut Cookies
 

Flourless Oatmeal Chocolate Chip Raisin Coconut Cookies
Yield: 18 cookies

1.5 cups quick cooking oats
1/2 tsp baking soda
1/4 tsp salt
1/4 tsp cinnamon 
2 Tbs brown sugar
2 Tbs raisins
2 Tbs coconut
2 Tbs chocolate chips
1 egg
1 Tbs honey
2 Tbs butter, melted (update: I used coconut oil with good results!)
1/2 tsp vanilla

  1. Combine the first 5 ingredients in a mini food processor. Pulse to combine and lightly grind up the oatmeal. 
  2. Transfer the dry mixture to a mixing bowl, then add the raisins, coconut and chocolate chips.
  3. In the mini food processor, combine the egg, honey, butter and vanilla, then pour into the dry mixture and stir to combine.
  4. Measure heaping Tbs of the dough onto a cookie sheet lined with parchment. (you should get 15 cookies)
  5. Bake at 350 degrees for about 10 minutes.

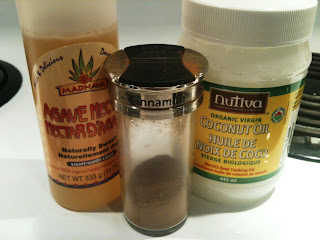
Honey Cinnamon Coconut Oil (Frozen Treat!)

I started taking coconut oil recently because I keep hearing about all the health benefits and that it can help with weight loss. Today I tried something new with it and wanted to share, because it was so good! 

The first time I tried coconut oil I ate it plain off a spoon. It's kinda solid so it has a strange but oddly fun texture as it melts in your mouth. I don't think I can eat it like that every day though, so I've been trying to come up with other ways to take it. 

I'm going to start using it for cooking instead of olive oil, and baking too... (not that I bake much, I hate baking!) But I'm going to try it instead of butter in my flourless oatmeal chocolate chip coconut cookies. And I think it might taste good drizzled on popcorn with a little salt (as a healthy alternative to butter), but I haven't tried that yet either. I've heard that a lot of people mix it in their coffee or tea, but that sounds like it would be really greasy to me. blech. But you never know, maybe it would be surprisingly good?!?


Honey Cinnamon Coconut Oil


Honey Cinnamon Coconut Oil (Frozen Treat!)
Yield:  1 serving

I didn't measure my ingredients, so this is just an estimation which you can adjust to your tastes accordingly.

2 tsp Organic virgin coconut oil
1 tsp Honey (next time I might try using Agave Nectar, which I show in the photo)
dash of Cinnamon

Directions:
  1. Stir ingredients together in a little bowl or cup (I used a little ramekin).
  2. Place in the freezer for 5 minutes (it goes hard really fast). Enjoy!!! :)

Wednesday, 13 June 2012

Balsamic Honey Mustard Salad Dressing

This is my absolute favorite salad dressing! I've been making it for years and I still love it. Normally if I order a salad at a restaurant, my dressing of choice is more creamy, like  Thousand Island and Ranch, then I put them both on my salad, mixed together. But when I'm in the mood for a vinaigrette, or if I'm serving a salad to company, this Balsamic Honey Mustard Dressing is definitely my go to recipe. And as a bonus, it's fat-free,quick and easy to mix together, and only has 3 ingredients!

You can use this dressing on any salad, but here's a typical idea of a salad I might make. 

  • chopped Romaine lettuce or Spinach
  • chopped green onions
  • shredded carrots
  • chopped bell peppers
  • shredded aged cheddar cheese or crumbled feta
  • craisins or raisins
  • slivered nuts or sunflower seeds
  • Sometimes: tuna, chicken, beets, celery, tomatoes, cottage cheese, avocado...

Balsamic Honey Mustard Dressing
Yield: 2 servings

1 Tbs Honey (I spray the measuring spoon with cooking spray so the honey slides out easily)
1 Tbs Dijon Mustard
3 Tbs Balsamic Vinegar

Combine ingredients with a whisk or shake it up in a container with a tight fitting lid.

For work I often mix the ingredients in a little tupperware container to bring with me, then shake it up before putting it on my salad, two days in a row.

Tuesday, 12 June 2012

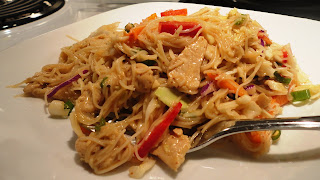
Gluten Free Stir Fry

This stir fry recipe is very versatile because you can really change up the ingredients depending on your tastes or what you have on-hand. I'll post the recipe as I made it this time, with some notes in brackets on ways you can change it up.

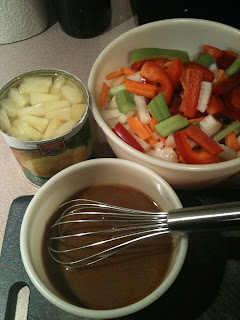
Ingredients, all prepped!

Gluten Free Stir Fry


Stir Fry
Yield: 4 servings

1 lb beef sirloin steak or pork tenderloin or chicken breasts cut into thin strips
Meat Marinade
2 Tbs gluten free soy sauce
1 Tbs vinegar
1 Tbs brown sugar
1 tsp Chinese 5-spice powder (or ginger)
1 garlic clove, minced

Stir Fry Sauce
3 Tbs corn starch
1.5 cups beef broth
1/3 cup gluten free soy sauce
2 Tbs sugar
pepper to taste

Stir Fry Veggies (approx. 6 cups, chopped)
bell peppers
carrots
onion
cabbage (I use coleslaw mix)
bok choi
celery
zucchini 
any veggies you want!

Final Additions (optional)
1 small can of sliced water chestnuts
1 small can pineapple tidbits
2 green onions, thinly sliced
1 tsp sesame seeds

Directions:

  1. Mix the marinade ingredients together and marinate the meat for 30 minutes.
  2. whisk the stir fry sauce ingredients together and set aside.
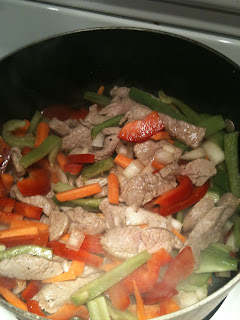
  3. Cook the meat in a large pot or wok over medium-high for about 2 minutes. Remove meat from the pot and set aside.
  4. Add 1 Tbs oil to the pot and cook the veggies for about 5 minutes, or until crisp-tender. Add the meat back into the pot.
  5. Whisk the stir fry sauce again and then add to the pot along with the water chestnuts and pineapple (if using). Cook until mixture boils and thickens, while stirring constantly, about 2 minutes.
  6. Add in the green onions and sesame seeds. Give it a good stir. Put on a lid, remove from heat and let sit for 5 minutes.
  7. Serve over rice.

Thursday, 7 June 2012

Chicken Cordon Bleu Casserole

I'm kind of embarrassed that almost all the recipes I've posted are for one-dish or casserole type meals. I guess I never really realized how often I make those kind of dinners. Well, just to add to the list, here's one more! The other night I made a gluten free Chicken Cordon Bleu Casserole and it was awesome! Even hubby liked it reheated for lunch the next day (a rare feat!). 

Rice on the Bottom

Chicken Layer

Ham Layer

Cheese layer

Cream of Chicken Soup Sauce Layer

Breadcrumb Layer


Chicken Cordon Blue Casserole
Yield:  6 servings

4 cups cooked rice
3 cups (approx) of cubed, cooked chicken
1-2 cups chopped ham (I used deli ham)
2 cups shredded cheese (I used mozza)
Cream of Chicken Soup Sauce

3 cups milk
2 Tbs cornstarch
4 tsp chicken bouillon granules
1 tsp mustard (not that I measure, 1 squirt!)

Breadcrumb Topping
2 slices of gluten free bread (lightly toasted)
1/2 teaspoon paprika
1/4 teaspoon garlic powder
salt and pepper to taste
2 tsp butter

Directions:

  1. Put cooked rice in bottom of a lightly greased 9x11 baking dish.
  2. Place chicken and ham evenly on top of rice.
  3. sprinkle shredded cheese evenly on top.
  4. Bring milk, cornstarch, chicken bouillon granules and mustard to a boil while whisking frequently. Once boiling, turn off heat and continue whisking for 1 minute. Pour over top of everything.
  5. In a mini chopper, combine all crumb topping ingredients and whirl until it forms a fine crumb mixture. Sprinkle the crumb mixture over top of the casserole.
  6. Bake at 375 degrees for 30-40 minutes (or until hot and bubbly). Cover with foil if crumbs start to get too brown. Mine was fine without covering but I just want to throw that out there in case your oven works differently than mine! :)


Thursday, 31 May 2012

Baked Pork Chop Cacciatore

This recipe for Pork Chop Cacciatore took some tweaking. Originally the recipe didn't include any rice, but I wanted to make it a one-dish meal, so I made it twice in the last couple weeks, adjusting ingredients until it turned out delicious! I love meals like this where you throw it together and then pop it in the oven while you take care of other things.


Baked Pork Chop Cacciatore
Yield:  6 servings

1 cup uncooked rice
6 pork chops, about 3/4 inch thick
2 bell peppers, cut into rings
1 onion, cut into rings
1 can (28 ounce) diced tomatoes
1 can (19 ounce) tomato sauce
1 Tbs of any mixture of the following (1 tsp Italian seasoning, 1 tsp oregano, 1 tsp basil)
1 tsp parsley
1 tsp garlic powder (or 2 cloves, crushed)
salt and pepper (to taste)
1/2 tsp sugar
1 cup water

Directions:

  1. Put rice in bottom of a lightly greased 9x11 baking dish.
  2. Brown seasoned pork chops (season the chops first with salt & pepper - or last time I seasoned them with about a Tbs of onion soup mix instead of salt and they were awesome!) . Place chops on rice.
  3. Top the chops with the pepper and onion rings. Drain the diced tomatoes, reserving the juice. Sprinkle the tomatoes evenly on top of everything.
  4. In a large measuring cup or bowl, combine the reserved tomato juice with the tomato sauce, seasonings and water. Pour over everything.
  5. Cover the dish with foil and bake at 360 degrees for 1 hour and 15 minutes. Let sit for 10 minutes before removing foil and serving.

Tuesday, 15 May 2012

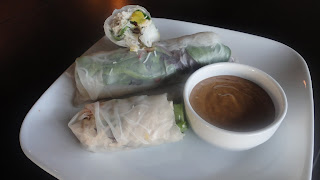
Gluten Free Chicken & Mango Spring Rolls

This is another recipe adapted from Kraft. These Chicken & Mango Spring Rolls are also known as summer rolls or salad rolls. The fresh ingredients are rolled in a Vietnamese rice paper wrapper and served with an Asian peanut dipping sauce. The original recipe called for cilantro but I left it out because I don't really care for it.

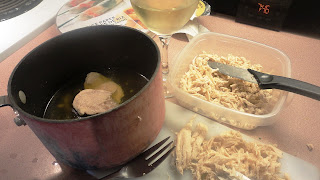
I cooked the chicken breast in chicken broth (bring to a boil then reduce heat and simmer for 15 minutes, then turn off burner and let sit for 10 more minutes with lid on) before shredding or chopping the chicken. I took a picture so you can see (plus you can see my wine in the background which I NEVER cook without! :)  By the way I love red and white wine. Have I mentioned this before?

Shredded Chicken Breast

Gluten Free Chicken & Mango Spring Rolls


Chicken & Mango Spring Rolls
Yield:  12 spring rolls

(always check labels to make sure ingredients are gluten free!)

12 rice paper sheet 
1/2 lb cooked shredded chicken breast (I poached in chicken broth, then shredded)
1 cup red pepper, chopped
3 green onions, chopped
1 mango peeled and chopped
2 cups lettuce
2 cups cooked rice vermicelli noodles
1/2 cup Asian style salad dressing (I use a W.F. brand)
1/3 cup natural peanut butter
1 Tbs gluten free soy sauce
1 Tbs water

Directions:
  1. Soak rice paper sheets, 1 at a time in warm water, following package instructions. My package said 5 seconds in the water, then 30 seconds on a flat surface before adding ingredients and wrapping.
  2. Place chicken, mangoes, peppers, onions, noodles and lettuce on the bottom of each rice paper sheet and roll up, folding in sides and enclosing filling.
  3. Mix remaining ingredients until blended and serve as a dipping sauce with spring rolls.

Wednesday, 9 May 2012

Baked Rice and Chicken Thighs

This recipe for Baked Rice and Chicken Thighs is so easy to throw together, you can literally have it in the oven in minutes. All you need is a veggie or salad to round out the meal. My kids and I were fighting over the last bit of rice in the pan after we finished eating this tonight because it was so good.
Gluten Free Baked Rice and Chicken Thighs
Before Baking

Gluten Free Baked Rice and Chicken Thighs
After Baking

Baked Chicken Thighs and Rice
Yield:  4 servings

1 cup uncooked white rice
8 boneless, skinless chicken thighs
1 package dry onion soup mix
2.5 cups water

Directions:
  1. Preheat oven to 375 degrees F.
  2. Spread the rice evenly into the bottom of a Lightly greased 13x9 baking dish. Lay the chicken thighs on top of the rice and sprinkle the onion soup mix evenly over all.
  3. Pour the water over everything (make sure you don't wash all the onion soup mix off the chicken). Cover the baking dish with foil and bake for 1 hour.
  4. Remove from the oven and let sit for a few minutes, then remove the foil and fluff the rice around the chicken a bit before serving.

Thursday, 3 May 2012

Gluten Free Slow Baked Oven Ribs

I'm so mad at myself because I made these super tender, delicious ribs and forgot to take a picture! These gluten free, slow baked oven ribs are truly tender. The sauce glazes onto them during the final hour of baking, creating a sticky, BBQ-like glaze that is finger licking good!

OK, speaking of finger licking good, here's the funny thing... I have a major aversion to getting my fingers dirty so I actually eat my ribs (and wings and pizza, etc..!) with a knife and fork... ALWAYS. Ha! :) I've tried using my hands to eat things like this before, and without fail I always have to get up part way through eating to wash my hands. My mom says that this was even an issue when I was a baby, I would cry and insist on clean hands even back then!

Luckily these ribs turn out so tender that the meat easily comes off the bone with a knife and fork, so not an issue at all.

Oven Baked Ribs (slow cooked & tender!)
Yield:  4 servings

2 slabs of pork back ribs
salt & pepper (to taste)
1 cup ketchup
1/4 cup brown sugar
1/4 cup apple cider vinegar (regular vinegar will also work fine)
1/4 cup honey
2 Tbs gluten free soy sauce
1 Tbs Franks hot sauce (or your fav hot sauce)
1 Tbs dijon mustard
1 tsp garlic powder (or 1 crushed garlic clove)
1/2 tsp chili powder
1/2 tsp paprika

Directions:
  1. Cut each rack of ribs in half to make a total of 4 half-slabs and place meaty side up on a rack in a 13x9 baking dish. Add 1/2 cup of water to the pan and sprinkle the ribs with salt and pepper to taste.
  2. Cover the pan tightly with foil and bake at 300 degrees for 2 hours.
  3. Meanwhile, prepare sauce by whisking the remaining ingredients together.
  4. Either drain, remove racks and return ribs to the pan, or (as I did) put the ribs in a clean pan, lined with foil and pour sauce over ribs. Turn the oven up to 350 degrees. Return the ribs to the oven and bake uncovered for 1 hour. You may need to baste the ribs a couple of times to make sure that the sauce fully coats the ribs.

Thursday, 26 April 2012

Gluten Free Baked Chicken Thighs

This is a really versatile recipe for Gluten Free Baked Chicken Thighs. Why is it so versatile you ask? Well because you can choose the ingredients based on what you have on hand, or what your taste theme for your meal is! Here are a few for salad dressing/spice ideas, but the options are limitless:
  • Caesar dressing with Italian seasoning
  • Honey Dijon dressing with curry powder
  • Balsamic dressing with garlic powder and thyme
  • Ranch dressing with paprika and oregano
  • Catalina dressing with taco seasoning
For the crumbs, I usually lightly toast two pieces of gluten free Udi's white sandwich bread and then turn it to crumbs in my mini food processor. Sometimes I add in a few tortilla chips or crackers too.  

Also, don't worry too much about measurements here... I usually just eyeball it but you can use the measurements listed as a guideline. Enjoy!

Chicken Thighs Before Baking


Chicken Thighs After Baking


Gluten Free Baked Chicken Thighs

Yield:  4 servings

8 chicken thighs (skin on or off, your choice)
1 cup gluten free crumbs (bread crumbs / cracker crumbs / tortilla chip crumbs)
1/3 cup Parmesan cheese

1 tsp (approx) spices (Italian seasoning, garlic power, onion powder, salt, pepper, etc.)
1/2 cup salad dressing (Italian, balsamic, ranch, Caesar, etc.)
Directions:
  1. Combine crumbs, Parmesan cheese and spices.
  2. Dip chicken in salad dressing, then coat with crumb mixture. Place on a rack in a baking sheet and bake at 375 degrees for 50 minutes (bone-in) or 35 minutes (boneless), or until cooked through. Placing on a rack helps the chicken from becoming soggy on the bottom.
  3. Let rest for 5-10 minutes before serving.

Saturday, 21 April 2012

Gluten Free Asian Honey Dijon Noodle Salad

This cold Asian noodle salad is another Kraft modification... very good. Check the ingredients on the salad dressings to make sure they're gluten free. The ones I bought for this weren't Kraft, they were a local store brand. I think a lot of the Kraft salad dressings are gluten free but check the ingredients to be sure.

Gluten Free Asian Honey Dijon Noodle Salad
Asian Noodle Salad
Gluten Free Asian Honey Dijon Noodle Salad

Yield:  6 servings

2 cups coleslaw mix (shredded cabbage and carrots)
2 green onions, chopped
1 red bell pepper, sliced into thin strips 

2 small chicken breasts, sliced really thin
2 Tbs Honey Ginger dressing
4 cups cooked vermicelli noodles, cold
1/2 cup Honey Dijon dressing
2 Tbs soy sauce (gluten free of course!)
1 tsp sesame seeds

Directions:
  1. Cook chicken in Honey Ginger dressing over medium-high heat, until cooked through.Cool.
  2. Combine all ingredients and serve. (lasts in fridge for a few days).

Thursday, 19 April 2012

Foil-Pack Chicken Fajita Dinner

I actually found this recipe on the Kraft website and changed it slightly. And it turned out great! I reheated a leftover foil-pack (took out of foil, put on a plate!) at work the next day and it was honestly even better than the night before. I don't know if it's the foil or what, but the chicken turns out very nice and tender.
Gluten Free Foil-Pack Chicken Fajita Dinner
Foil-Pack Chicken Fajita Dinner
   

Yield:  4 servings
1-1/2 cups instant rice, uncooked
1-1/2 cups hot water
2 Tbs taco seasoning mix (I make my own, will post recipe asap!)
4 boneless skinless chicken breasts (about 1 lb total)
1-2 green and red peppers, cut into strips
1/2 cup salsa
1 cup Sharp Cheddar Cheese, shredded
  Directions:
  1. Heat oven to 400 degrees.
  2. Lay out 4 large sheets of foil and spray with cooking spray.
  3. Season chicken with 1 Tbs taco seasoning, on both sides.
  4. Combine rice, hot water and the other 1 Tbs taco seasoning. Spoon equal amounts of rice mixture onto center of each piece of foil. Top the rice with the chicken and remaining ingredients.
  5. Bring up sides of foil and fold top and ends together a few times to seal each packet.
  6. Place on a baking sheet and bake for 40 minutes or until chicken is done. Let stand 5-10 minutes before serving.
  7. Serve with sour cream (or not!).

Wednesday, 18 April 2012

Gluten Free Asian, Mexican and Greek!

Just wanted to post pictures of a few of this week's meals. I made an asian noodle salad, chicken fajita foil wrapped individual dinners and greek inspired gluten free tortilla pizza. All super yummy and I will post the recipes shortly! :)

Asian Noodle Salad

Chicken Fajita Foil Wrapped Dinner

Gluten Free Greek Tortilla Pizza

Friday, 13 April 2012

Gluten Free Sweet & Sour Pork

Here's my gluten free sweet & sour pork recipe. I've been using this recipe for years (like 15+ years!), but I've tinkered with it so many times that it would be interesting to go back to the original recipe now to see how different it is. Actually, the original recipe was for sweet and sour chicken, but I've used chicken/pork interchangeably over the years and both work great!

Gluten Free Sweet and Sour Pork
I prep everything before cooking so that it comes together easily.


Gluten Free Sweet and Sour Pork
I sprinkled some pepper, ginger and garlic powder onto the pork while it browned (not in instructions).


Gluten Free Sweet and Sour Pork
Everything cooking up nicely. Isn't it pretty!? :)

Gluten Free Sweet and Sour Pork
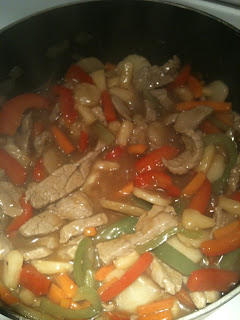
This is after adding the sauce, pineapple and water chestnuts.


Gluten Free Sweet and Sour Pork
And VOILA! The Sweet & Sour Pork served on Rice.


Sweet and Sour Pork

Yield:  6 servings

1 pork tenderloin, cubed or sliced
1 cup carrots, sliced into thin strips
1 red bell pepper, sliced into strips
1 green bell pepper, sliced into strips
1 onion, sliced into strips
2 garlic cloves, minced
1/3 cup white vinegar
1/4 cup gluten-free soy sauce

1/4 cup cold water (or chicken broth)
3 Tbs firmly packed brown sugar
2 Tbs cornstarch
1/4 tsp ground ginger  
1 14 oz can pineapple tidbits (including juice)
1 8 oz can sliced water chestnuts


Directions:
  1. Spray cooking spray in a large pot or wok and cook pork over medium-high heat, until lightly browned. Add carrots, peppers, onion and garlic and continue cooking until crisp-tender.
  2. In a bowl, combine vinegar, soy sauce, cold water, brown sugar, cornstarch and ginger. Pour over pork mixture and stir in pineapple tidbits (including juice) and water chestnuts.
  3. Cook until boiling, about 2 minutes. After it comes to a boil I usually take it off the burner, cover it and let it sit for a few minutes before serving. Serve over rice.
Tuesday, 10 April 2012

Carnival Cruise - Gluten Free Review

And finally - Gluten Free review of my Carnival Cruise... 

Our 7-night Carnival cruise aboard the Splendor was a success! We all had a great time and the kids loved Camp Carnival. 

I was excited to see how the gluten free experience would be. The first night we wend to the main dining room and I informed our server that I'm gluten free, so he sent over the restaurant hostess to speak with me. She was very accommodating and told me what my options were for dinner that first night. From then on she came to the table every evening to take my gluten free order for the next night. 

I meant to take pictures of everything, but I can't tell you how many times I finished eating and then smacked my head with my hand as I realized I forgot to take a picture of my meal *again*, ugh. So here are a few photos that I did remember to snap:

Gazpacho

French Onion Soup

Stuffed Mushrooms

Yukon Gold Potato Cream Soup


Assorted Seafood Newberg Style

Steak with Vegetables

Warm Chocolate Melting Cake

Not sure what this was but it tasted like white chocolate mousse

Cherries Jubilee
 
Gluten Free Bread
 Everything was really good. The gluten free bread grew on me. The first night I took a bite of it and went YUCK! But they kept bringing it to me every night so I just kept trying it and I honestly liked it more and more. The best way to describe it is like warm biscuits. So I just slathered on the butter and ended up kind of missing it by the time I got home from the cruise.

I started off being really careful when I'd eat breakfast and lunch up at the buffet, but by halfway through the week I quit worrying about it. Like I've mentioned before, I do not have celiac disease, the main reason I east gluten free is because it really helps with my tummy issues (IBS). I still used common sense with the food choices I made, but I just stopped worrying about hidden gluten. And I was fine and didn't have any ill-effects.